You must have tried various versions of mac and cheese. But have you ever tried Jamie Oliver cauliflower mac and cheese? It’s a cheesy, ooey-gooey, and comforting recipe and a great way to serve veggies and pasta without heavy carbs. Adding cauliflower with macaroni to the cheese makes this a perfect dinner option.
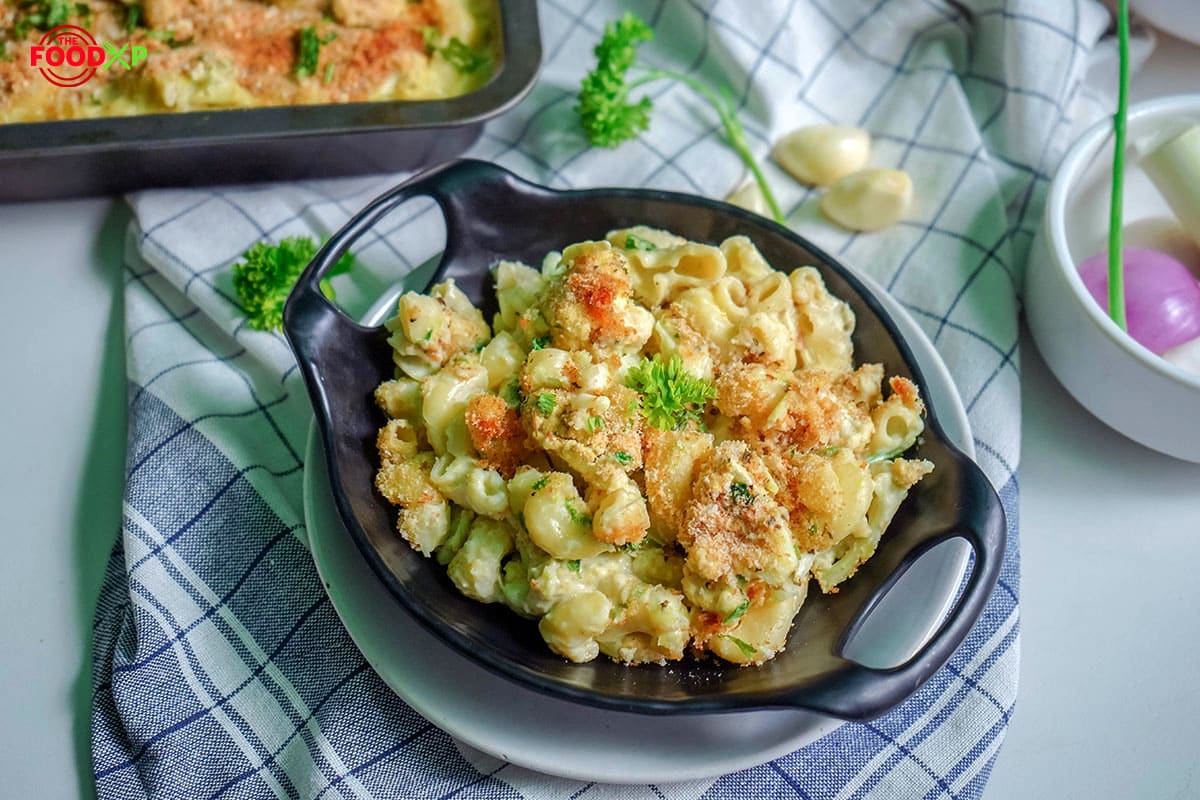
Jamie Oliver mac and cheese is a classic twist on traditional mac and cheese. When we say ‘classic,’ we mean it. Our chef made this recipe, and it was yummy. It is a solid dose of simple cheese sauce, veggies, and pasta. The result is super creamy.
The best part about this recipe is that it works well with any pasta shape you want. Also, there are plenty of ways to spice up this recipe. You can add some meat or any veggies.
So, what’s stopping you now? Go through this guide and learn how to make Jamie Oliver cauliflower mac and cheese. HACK: You may achieve the same flavors and texture if you follow the recipe guide. This dish is a quick and easy weeknight meal, especially for a special occasion. So, it is necessary to know more about this recipe before proceeding to its making part.

What's In The Post
Is This The Exact Jamie Oliver’s Cauliflower Mac And Cheese Recipe
Yes, this is Jamie Oliver’s cauliflower mac and cheese recipe. Recreating this recipe was tough, but when our chef followed his technique, it came out perfect.
Recreating the recipe of the legend Jamie Oliver is challenging. However, we’ve tried our best to reinvent this delectable dish. We hope that this recipe will live up to your expectations.
What Is Cauliflower Mac And Cheese?
Cauliflower mac and cheese is a healthier and low-carb alternative to the classic macaroni and cheese dish that replaces some or all of the pasta with cauliflower florets. Like pasta, the cauliflower florets are typically steamed or boiled until tender and mixed with a cheese sauce before being baked or broiled until bubbly and golden.
This classy variation is a nutritious twist on a comfort mac and cheese, providing the benefits of cauliflower’s vitamins, minerals, and fiber while delivering the indulgent taste of mac and cheese. It is a popular choice for a low-carb or gluten-free diet.

How Is This Cauliflower Mac And Cheese Different?
The homemade cauliflower mac and cheese contain tender elbow macaroni and crispy cauliflower florets. However, the traditional cauliflower mac and cheese is made without pasta.
Our chef has played off with the term’ cauliflower mac and cheese.’ Instead of making a roux, our chef Jasbir has made a creamy sauce using cauliflower. Also, we have substituted half of the macaroni with cauliflower florets.
Is This a Recipe Keto?
No, this recipe is not keto-friendly, as we have used traditional macaroni made from flour. So, if you’re on a keto diet or watching out for your carbs intake, this cauliflower mac and cheese is a big no-no.
Mac and cheese is the ultimate comfort food. Experimenting with cauliflower is like icing on the cake. But this homemade cauliflower mac and cheese version is not OKAY for those on a keto diet. However, it is easy to swap it with keto pasta alternatives. You can buy low-carb pasta like shirataki noodles from the grocery store or make zucchini noodles or spaghetti squash at home.
Equipment Required For Jamie Oliver Cauliflower Mac And Cheese?
- Oven – Bake the cauliflower mac and cheese in the oven for half an hour until golden and bubbling.
- Baking Dish – Add the layer of cooked macaroni and cauliflower florets in a baking dish, followed by freshly prepared white sauce and breadcrumbs for baking.
- Pot – Cook macaroni and cauliflower florets in a pot containing salted boiling water for five minutes until tender, not mushy.
- Saucepan – Prepare cheese sauce by adding flour, milk, and spices. Also, you will use a pan to cook leeks, celery, and fennel until soft but not colored.
- Food Processor – Blitz the prepared cheese sauce in the processor until a smooth and creamy sauce is formed.
- Spatula – Use a spatula to stir the cheese sauce to ensure no lumps.
- Knife – Chop the veggies into slices beforehand with a sharp knife.
- Grater – Grate the different types of cheese for a cheesy bite with a grater.
- Chopping Board – Chop the veggies on the chopping board for fine cutting.

Jamie Oliver Cauliflower Mac And Cheese Ingredients
- Cauliflower – Cauliflower is the critical ingredient that adds sweetness when cooked and layered in the baking dish.
- Macaroni – We have used macaroni for this recipe as it will yield a lovely texture. You can also use cavatappi, Gemelli, campanelle, or whatever pasta you want.
- Cheddar Cheese – Our chef Jasbir has used cheddar cheese for a lovely nutty and rich flavor. You can also use Gouda, Muenster, fontina, Havarti, and Monterey Jack.
- Parmesan Cheese – Parmesan cheese will add a hard, gritty texture with a fruity and nutty taste, when sprinkled over the dish.
- Butter – Sauté veggies and prepare the sauce in unsalted butter for rich flavor and healthy cooking.
- Milk – Skimmed milk will add texture and form foam in the cheese sauce.
- Olive Oil – Add a splash of olive oil while cooking the veggies for an added flavor.
- Flour – Add the flour while making the sauce to thicken it.
- Italian Breadcrumbs – Italian breadcrumbs is sprinkleed over the dish to add a lovely crunch once baked.
- Celery – The celery stalks will add a mild, sweetish, and aromatic taste to the recipe.
- Leeks – Leeks will add a sweet and oniony flavor that adds depth to pasta.
- Fennel – Fennel will add sweetness when cooked.
- Parsley – We’ve scattered a few teaspoons of parsley over the dish before baking it for a refreshing note.
- Garlic – Saute garlic until aromatic before preparing the sauce.
- Salt – Sprinkle salt while making the sauce to enhance its flavor.
- Black Pepper – Season the sauce with black pepper for an intense flavor.
- Mustard Sauce – The addition of mustard sauce will give it a delicious sharpness.
Jamie Oliver Cauliflower Mac And Cheese Ingredients Substitutions
- Cauliflower – We’ve used fresh cauliflower florets for the best flavor. But you can also use frozen florets for the recipe. Thaw them before proceeding, or your cooking time will increase.
- Macaroni – Our chef has used macaroni in this recipe. But feel free to experiment with any type. We suggest using elbow pasta, cavatappi, fusilli, or penne, as they can hold the sauce very well.
- Cheese – Our chef Jasbir has used a mix of parmesan and cheddar cheese for a lovely nutty and rich flavor. You can also use Gouda, Muenster, fontina, Havarti, and Monterey Jack. Ensure it melts appropriately or won’t make a smooth sauce.
- Milk – We’ve added skimmed milk while making the sauce for a foamy texture. For a nuttier version, add almond milk or coconut milk.

Jamie Oliver Cauliflower Mac And Cheese Preparation And Cooking Timings
| Preparation Time | Cooking Time | Total Time |
|---|---|---|
| 15 Minutes | 1 Hour | 1 Hour 15 Minutes |
Jamie Oliver Cauliflower Mac And Cheese Recipe Step

Step 1- Melt butter in a medium saucepan with olive oil over medium heat.
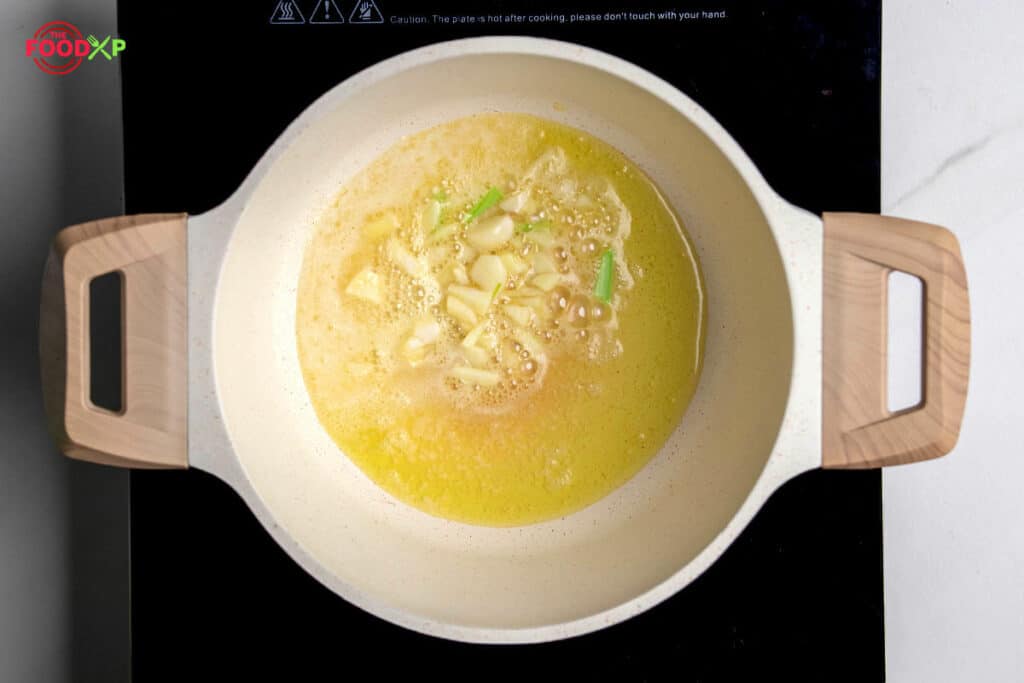
Step 2- Once melted, saute two cloves of garlic.
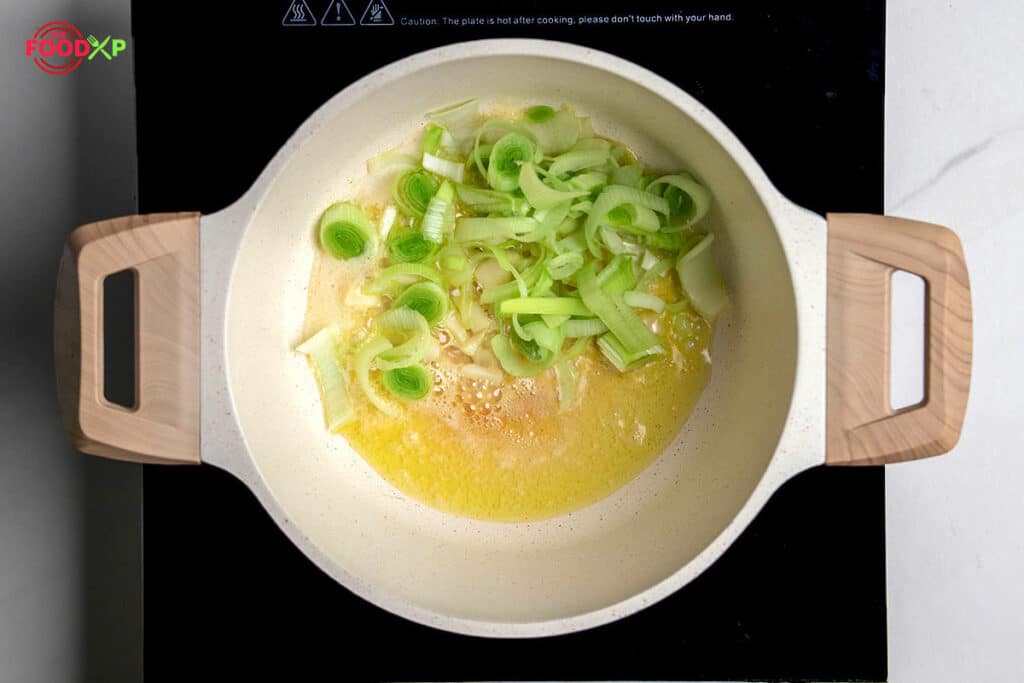
Step 3- Add trimmed leeks and one stick of celery.
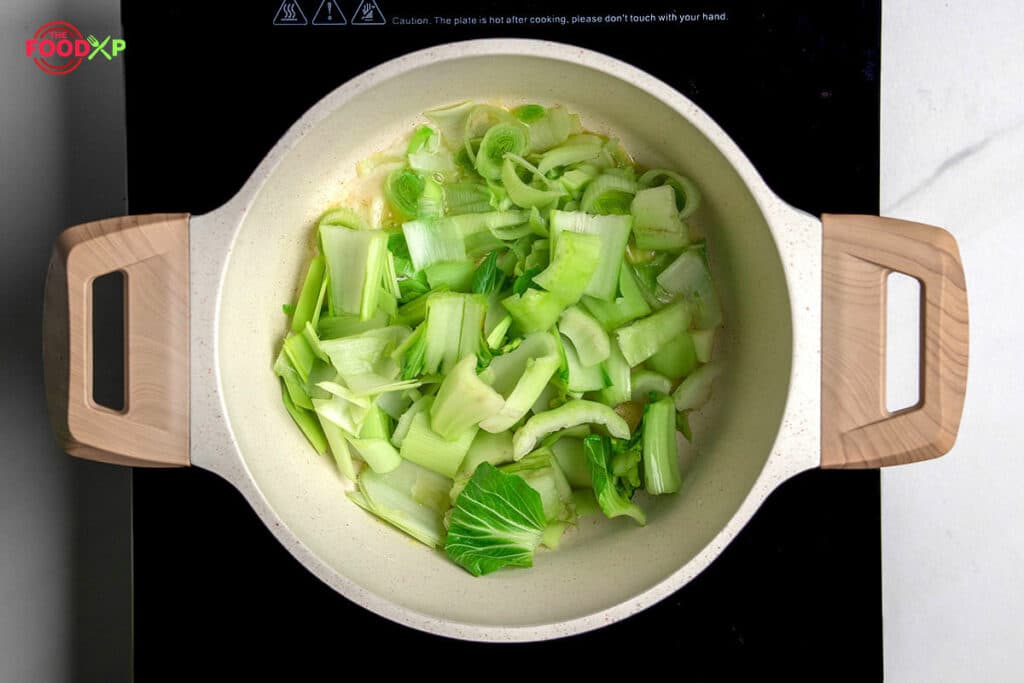
Step 4- Afterward, add sliced fennel bulb and saute for five minutes.
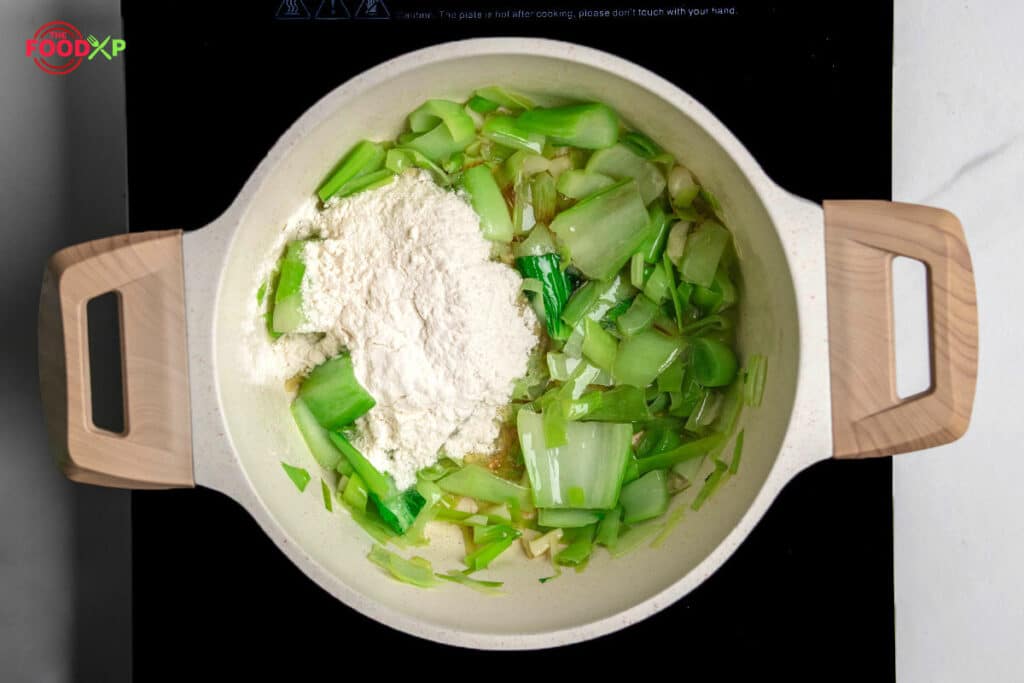
Step 5- Stir two cups of refined flour into a saucepan for 30 seconds.
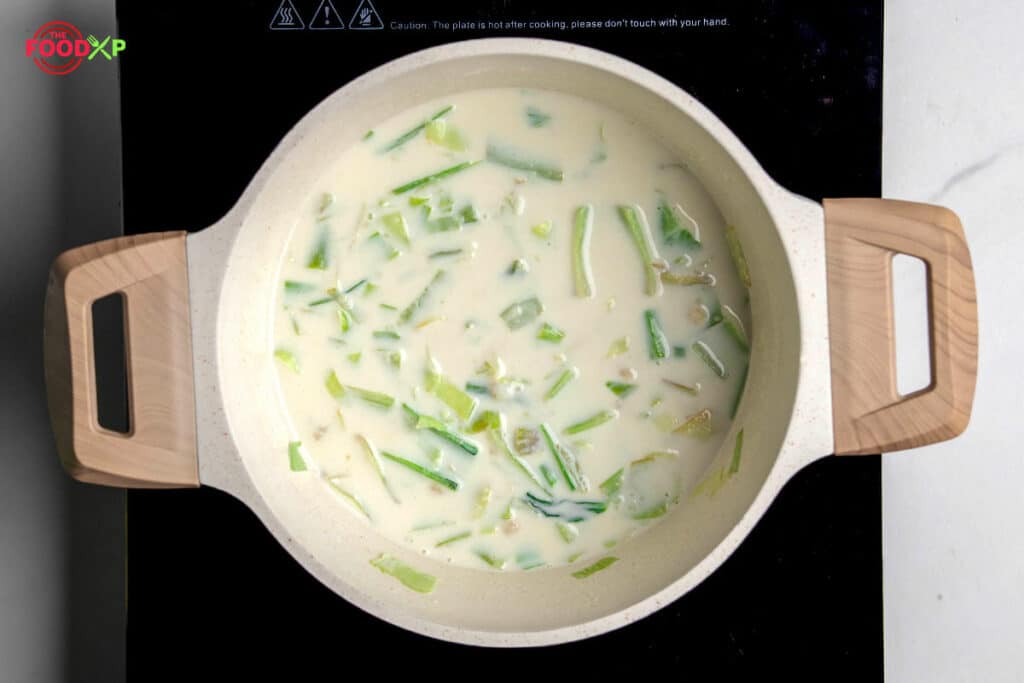
Step 6- Pour the skimmed milk gradually, stirring occasionally.
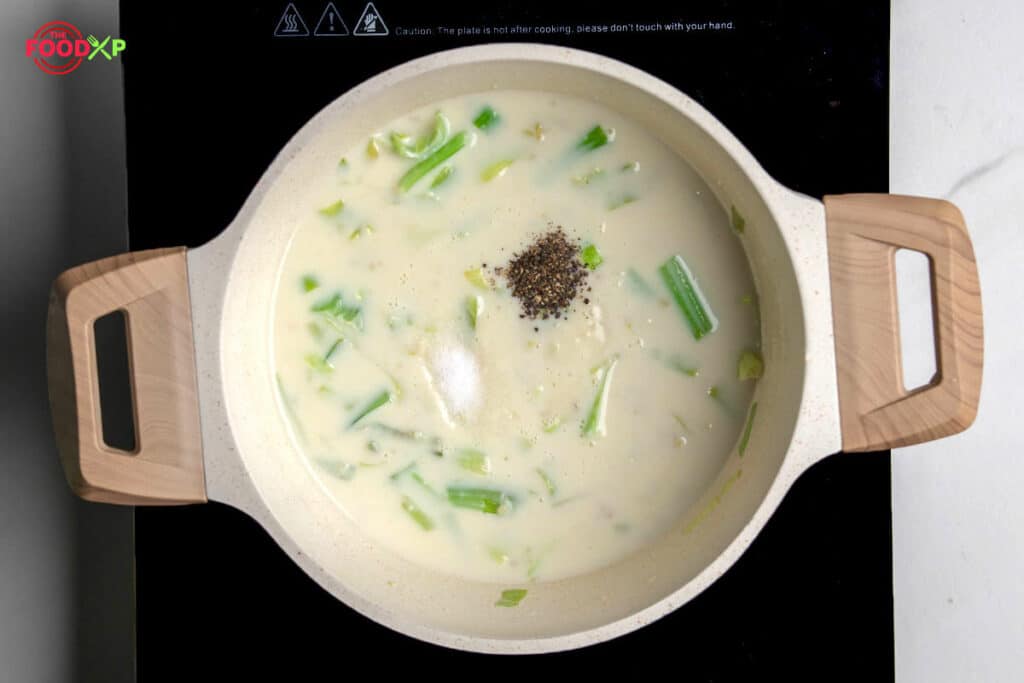
Step 7- Season it with black pepper.

Step 8- Now, add mustard sauce and salt over the partially cooked sauce.
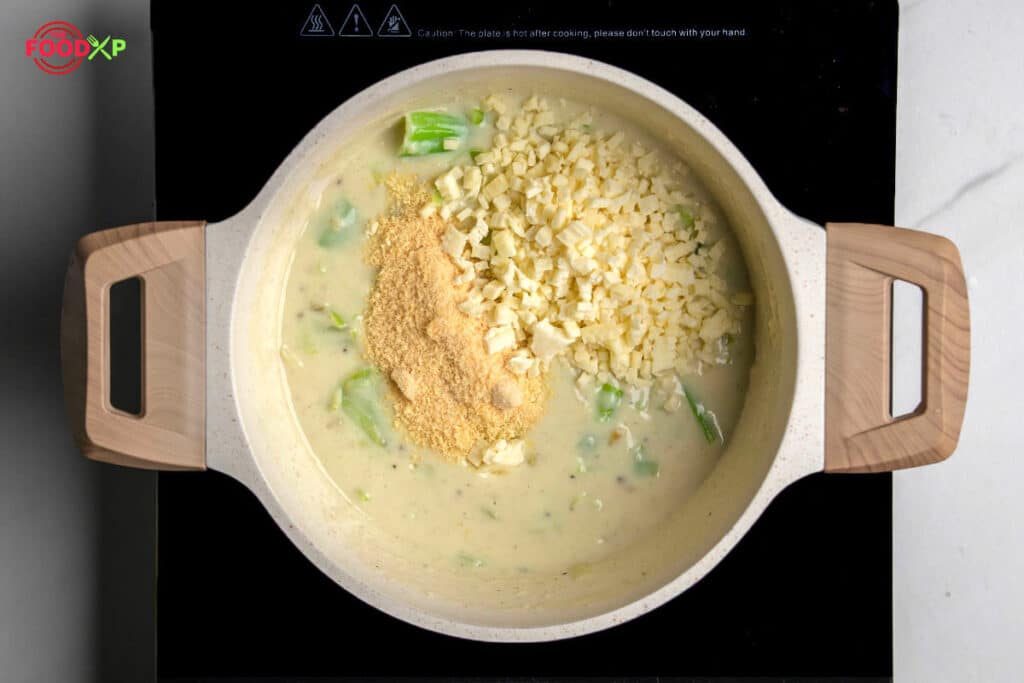
Step 9- Stir grated cheese and cheese mix into the sauce and cook until thickened.
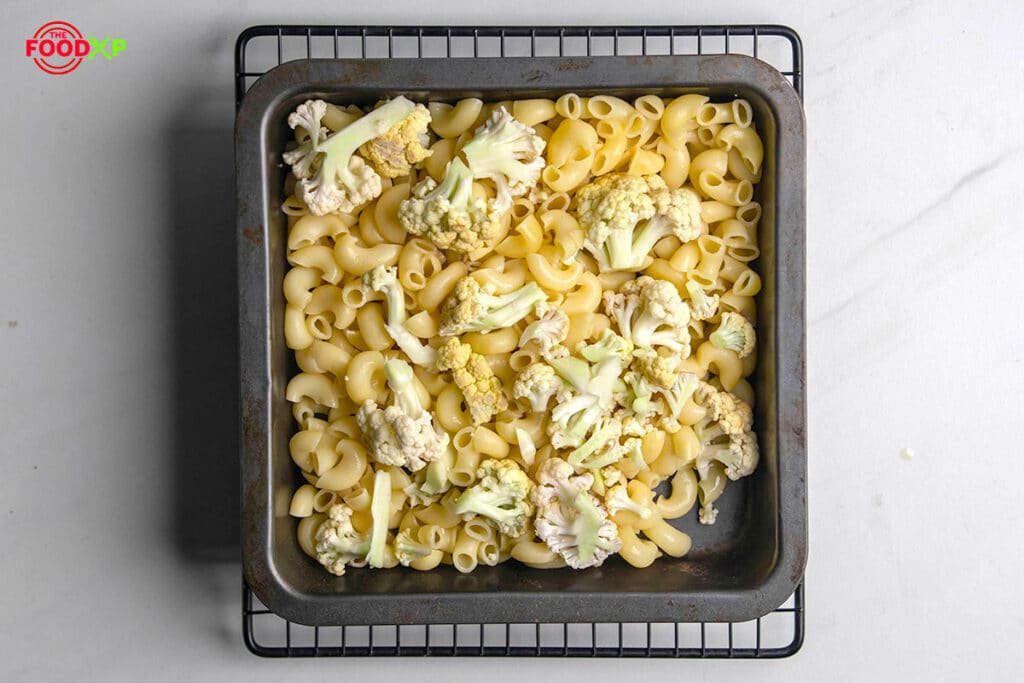
Step 10- Transfer the macaroni into a 25cm x 35cm baking dish along with the cauliflower florets.
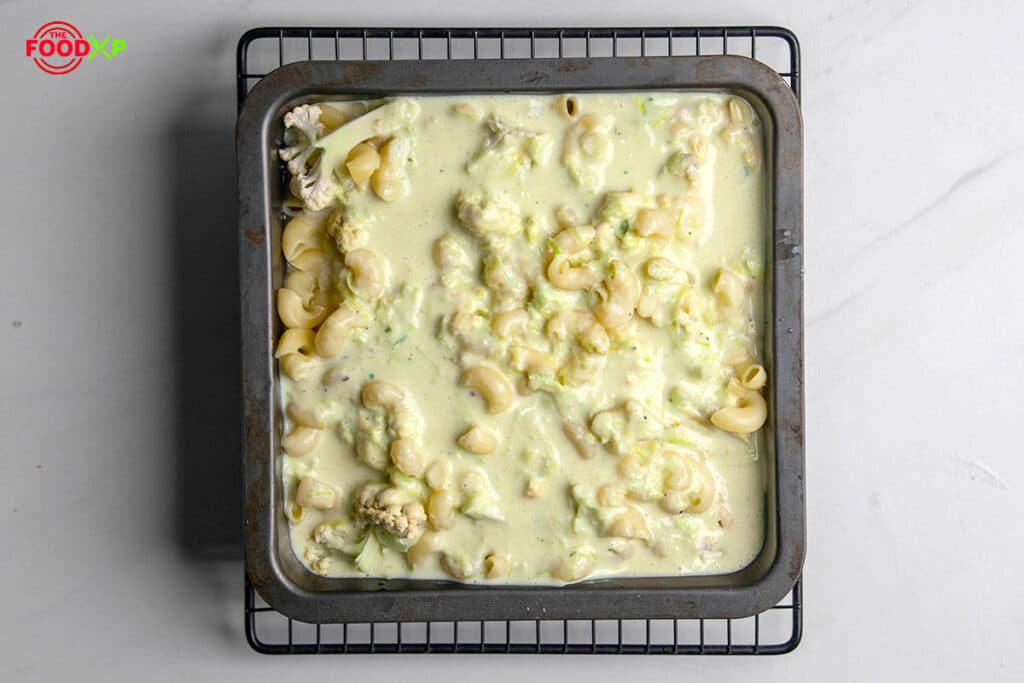
Step 11- Pour the sauce over the layer of pasta and cauliflower florets.
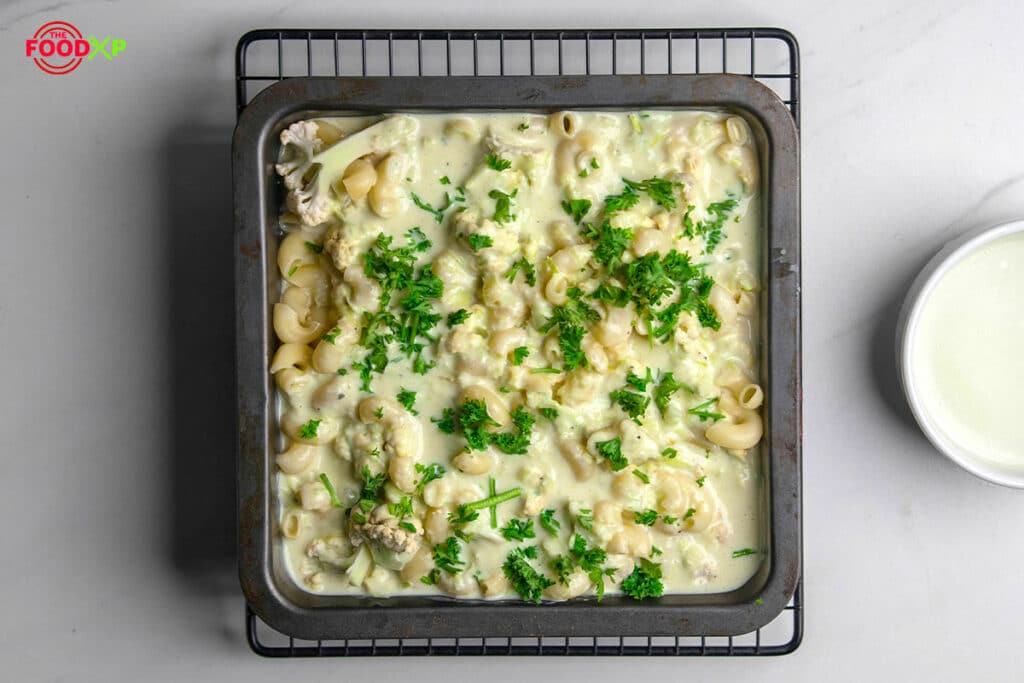
Step 12- Sprinkle chopped parsley and pasta water over the dish.
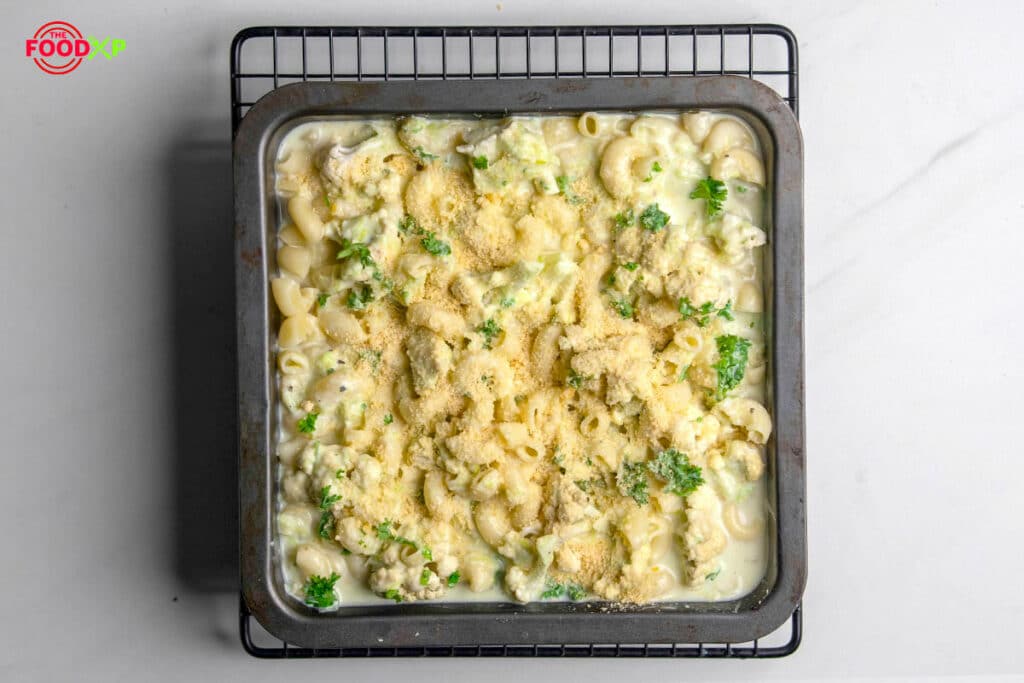
Step 13- Top it with some parmesan over the pasta.
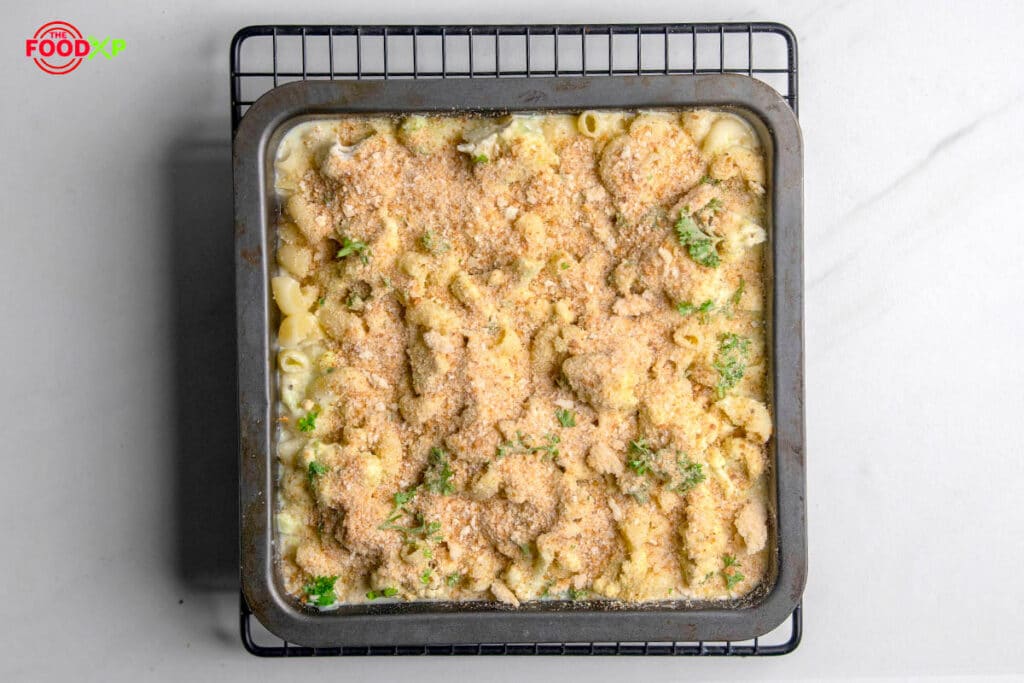
Step 14- Scatter some Italian breadcrumbs.
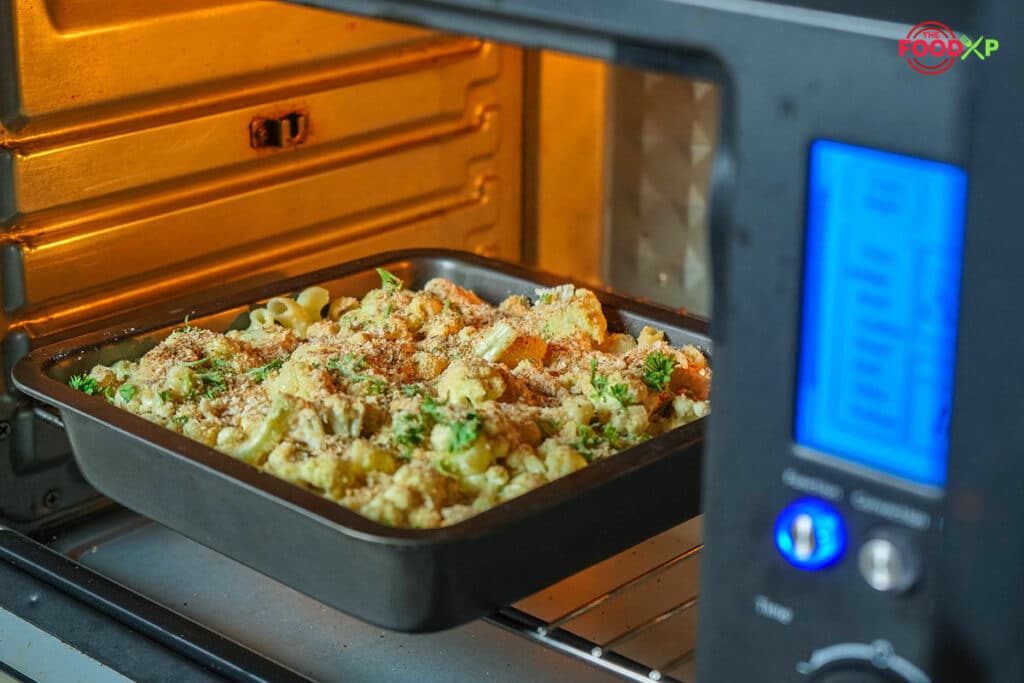
Step 15- Bake the dish for half an hour or until golden and bubbling.
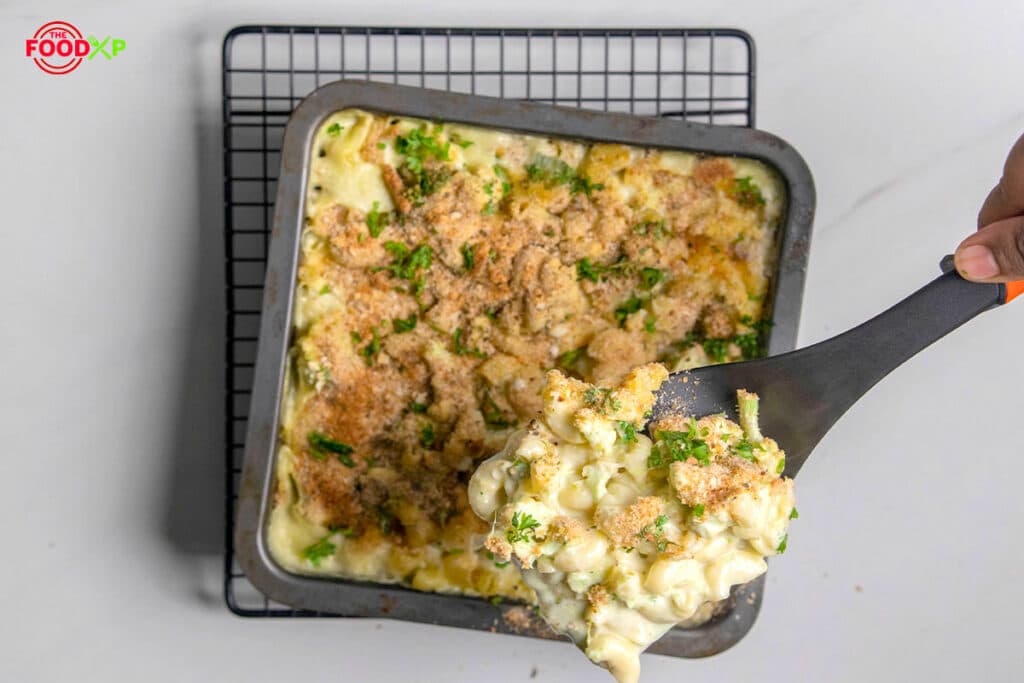
Step 16- Let it cool down for a few minutes, serve it with your favorite side dish, and enjoy.
Tips To Make Jamie Oliver Cauliflower Mac And Cheese Better
This cauliflower mac and cheese is an all-around crowd-pleaser! It is perfect on its own. But to make it better, consider the following tips:
- Cook The Pasta Al Dente – Before assembling the dish, it is necessary to slightly cook the pasta as it will continue to bake in the sauce in the oven. But, if you overcook macaroni on the stovetop, it will get mushy and break apart after baking.
- Cool The Pasta – We coat the warm pasta in the sauce for ease. But do you know, it’s not good? Doing so will make the dish soggy as warm elbow macaroni absorbs too much of the sauce after baking. So, let your cooked pasta rest with the cauliflower and pasta water.
- Use Warm Milk To Make The Sauce – We generally use cold milk to make the sauce quickly. But do you know it will leave lumps in the sauce? So, use warm milk to thicken the sauce and prevent lumpy cheese sauce.
- Grate Your Cheese For The Sauce – You can use any grated cheese for the sauce. But it is advised to grate your cheese. Store-bought shredded cheese prevents the cheese from melting efficiently due to anti-caking agents. It further sticks with the sauce, leaving a grainy texture of the sauce.
- Roast The Cauliflower – Our chef has added boiled cauliflower to this recipe. But roasting it will add depth to the recipe. So, try roasting it in the oven before incorporating it into the dish to bring out the cauliflower’s natural sweetness.
- Gratin-Style Finish – Baking this dish will add next-level flavors, but broiling it for a few minutes will add an irresistible texture and visual appeal. It will create a golden and slightly crispy top which is sure to try.

How Will This Recipe Look And Taste Like?
This homemade version of Jamie Oliver’s cauliflower mac and cheese is a healthier version of classic mac and cheese. It is cheesy and creamy, with a hint of cauliflower in every bite. Beating this recipe was tough. But we’ve tried our best and recreated this recipe.
The result was a golden-brown top with a slightly crispy topping. Inside, you’ll notice a creamy, cheesy sauce coating the cauliflower and pasta. Talking of its taste, it’s comforting.
The steamed cauliflower, then blended into a creamy sauce, has added a mild and slightly sweet taste. I’m sure you will like this recipe too. It would be a win-win situation to try your hands on this recipe.
Jamie Oliver Cauliflower Mac And Cheese Nutritional Values
Jamie Oliver cauliflower mac and cheese is not only tasty but also healthy. Since this recipe contains cauliflower with macaroni, it is packed with nutrients. However, this recipe will not work if you follow a low-carb and low-fat diet, as the sauce is made with butter and milk.
For more information, I’ve curated a list of nutritional value to watch out for before having a bowl of this delectable dish.
| Calories | 581 kcal |
| Carbohydrates | 78.5 g |
| Protein | 25.3 g |
| Fat | 20.8 g |
| Saturated Fat | 11.2 g |
| Sodium | 1.3 mg |
| Fiber | 3.8 g |
| Sugar | 10.8 g |

How To Store This Jamie Oliver Cauliflower Mac And Cheese?
It is always advised to consume the recipe made with cheese on the same day. Still, if you are left with a few spoons, restore them properly. Below are the ways to keep it safe for more extended periods.
- If you are left with a spoonful bowl, store it in an airtight container, cover it tightly with aluminum foil or plastic wrap, and then pop it in the refrigerator for four days.
- Besides this, if you have partially prepared the meal beforehand and want to assemble it later, store cooked cauliflower and cheese sauce separately. But you must note that freezing this recipe is not ideal. However, you can do it by wrapping it tightly in an airtight container and storing it for up to three to four months. When ready to eat, thaw in the fridge and reheat well.
What To Serve With This Cauliflower Mac And Cheese Recipe
This homemade version of Jamie Oliver’s cauliflower mac and cheese is fulfilling. Still, if you want to serve it with another low-carb dish, you can add salad to make it a complete meal. Try air fryer dishes or roasted cauliflower, roasted chicken, or coleslaw. Here are a few examples –
- Coleslaw – Coleslaw is an easy side that goes well with mac and cheese. You can prepare it at home too as it is pretty easy to make.
- Roasted Cauliflower – Mac and cheese is a decadent dish. You can serve it with roasted cauliflower. The contrasting flavors will elevate your dinner night.
- Pulled Pork – Nothing is more satisfying than a bowl of pulled pork with mac and cheese. The tender, smoky flavors of the pork will go well with the richness of the mac and cheese.
- Pork Tenderloin – This juicy dish is best with mac and cheese. The tender and juicy pork will melt in your mouth, making it a satisfying dinner.
Other Jamie Oliver Recipes To Try
This homemade version of Jamie Oliver cauliflower mac and cheese is the exact Jamie Oliver cauliflower mac and cheese recipe. You can also experience this delightfulness at home if you follow our guide.
Besides, we have more Jamie Oliver recipes on our websites that you can try, like Jamie Oliver Pesto Chicken Pasta, Jamie Oliver Mushroom Risotto, Jamie Oliver Potato Salad, Jamie Oliver Gazpacho Soup, and Jamie Oliver Pizza Dough.
Recipe Card
Jamie Oliver Cauliflower Mac And Cheese Recipe
Equipment
- Oven
- Baking Dish
- Pot
- Saucepan
- Food Processor
- Spatula
- Knife
- Grater
- Chopping Board
Ingredients
- 500 grams Cauliflower
- 2 cups Macaroni
- 2 tablespoons Unsalted Butter
- 1 tablespoon Olive Oil
- 500 ml Skimmed Milk
- 100 grams Cheddar Cheese
- 100 ml Parmesan Cheese
- 2 tablespoons All-Purpose Flour
- 1 Leek
- 1 stick Celery
- ½ cup Fennel Bulb
- 1 sprig Parsley
- 1 cup Italian Breadcrumbs
- 2 cloves Garlic
- 1 teaspoon Mustard Sauce
- 1 teaspoon Black Pepper
- ½ teaspoon Salt
Instructions
- Melt butter in a medium saucepan with olive oil over medium heat.
- Once melted, saute two cloves of garlic.
- Add trimmed leeks and one stick of celery.
- Afterward, add sliced fennel bulb and saute for five minutes.
- Stir two cups of refined flour into a saucepan for 30 seconds.
- Pour the skimmed milk gradually, stirring occasionally.
- Season it with black pepper.
- Now, add mustard sauce and salt over the partially cooked sauce.
- Stir grated cheese and cheese mix into the sauce and cook until thickened.
- Transfer the macaroni into a 25cm x 35cm baking dish along with the cauliflower florets.
- Pour the sauce over the layer of pasta and cauliflower florets.
- Sprinkle chopped parsley and pasta water over the dish.
- Top it with some parmesan over the pasta.
- Scatter some Italian breadcrumbs.
- Bake the dish for half an hour or until golden and bubbling.
- Let it cool down for a few minutes, serve it with your favorite side dish, and enjoy.
Video
Nutrition
Frequently Asked Questions (FAQs)
What is Jamie Oliver mac and cheese?
Jamie Oliver mac and cheese is a type of macaroni and cheese dish made with Jamie Oliver’s signature blend of cheeses.
How do you make Jamie Oliver mac and cheese?
The process of making Jamie Oliver mac and cheese is relatively simple. First, you must cook the macaroni as per the package directions. Once the noodles are cooked, you must mix in the cheese until they are fully combined. Once the cheese has been mixed in, you will need to bake the dish according to the recipe instructions.
How can you enjoy Jamie Oliver mac and cheese?
You can enjoy Jamie Oliver mac and cheese in a few different ways. One way is to enjoy it straight out of the oven, and another is to top it with some of your favorite toppings, such as bacon, green onions, or diced tomatoes. Whatever method you choose to enjoy, Jamie Oliver Mac and cheese is sure to be a hit!
Why put mustard in mac and cheese?
Mustard won’t add a strong taste but will cut the overwhelming creaminess of mac and cheese. It will add a slight tanginess. And with that, everyone’s favorite comfort food just got a whole lot more comforting.
Conclusion
Jamie Oliver cauliflower mac and cheese is a healthier, just as creamy and delicious version of the classic mac and cheese.
This dish is the perfect comfort food for any occasion. It is easy to make yet yields impressive results. Anybody can make this dish, which will please even the pickiest eaters.


