
Making chocolate tuiles at home using this recipe will be very interesting. They make any dish so presentable that you won’t be able to wait to grab a spoonful.
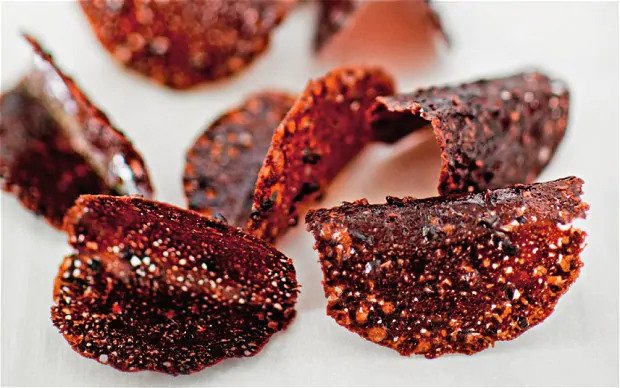
I was at a restaurant and ordered a vanilla ice cream. What will you expect ice cream to be served like. They served me the ice cream with a chocolate tuile on it. I got so mesmerized by the presentation of simple flavored ice cream. It just turned it into a fancy dessert. What a great idea it is, right? This made me wonder, can we make it at home easily?
To make chocolate tuiles, beat butter, sugar, egg whites and vanilla together. Add cocoa flour cocoa mixture to it. Mix them well and let them rest for 1 hour atleast. Make a small stencil out of a plastic sheet or cardboard. Pour the batter in the center of the stencil and spread. Prepare a few of them and bake in a preheated oven till the edges turn brown. Cool them before use.
It was just a short summary of the recipe. You will get to know in detail further. It is an easy recipe. It will help you give a fancy touch to a dessert. You can even store them in an airtight container for future use. But before we jump onto the recipe, let’s check out some other desserts that you might like.
1. Chocolate Avocados Mousse- Avocado Chocolate Mousse is a healthy no-bake dessert recipe made with a few ingredients in a few minutes. It’s vegan, refined sugar-free and tastes sweet and rich.
2. Hot Chocolate Bomb– Hot chocolate bombs are made of hollow chocolate spheres. These can be filled with a hot chocolate mix or cocoa powder or miniature marshmallows and peppermints for innovation. These also make a good thing to gift this festive season.
3. Classic Dark Chocolate Mousse- Classic chocolate mousse makes any dinner feel a little more fancy. It’s great for a dinner party because it looks so pretty, everyone gets their own serving, and you can make it ahead.
4. No-Bake Chocolate Marquise- For the ultimate chocolate lover in you, this easy to make and yummy in taste no-bake chocolate marquise is a must have for you.
What's In The Post
Ingredients for Chocolate Tuile
- ½ cup Unsalted Butter (room temperature)
- 1 cup Confectioners’ Sugar (sifted)
- 4 Egg Whites
- ½ teaspoon Vanilla Extract
- 5 tablespoon Processed Cocoa Powder
The ingredients you require to make the tuile are readily accessible in any supermarket. You might find some of them in your kitchen. So make a note and then proceed to the time you need to prepare this recipe.
How Much Time It Will Take To Make Chocolate Tuile?
| Preparation Time | Cooking Time | Additional Time | Total Time |
|---|---|---|---|
| 45 minutes | 8 minutes | 1hour 7 minutes | 2 hours |
The recipe is a little time consuming. But do not stress out as the only time consuming part is time to set the chocolate. Now moving onto the steps to follow.
Steps to Make Chocolate Tuile

- Take the jar of an electric mixer and beat sugar and butter in it at medium-high speed. Beat the one egg white at a time in it. Followed by the vanilla.
- Reduce the speed of the mixer and add cocoa powder. Mix them well. Avoid over mixing. Cover the bowl and chill it for 1 hour atleast.
- Set the oven to preheat mode at 325 degrees F (165 degrees C)
- Now, tale a thin sheet of plastic or cardboard and cut a whole of 3 ½ inch diameter to make a tuile template. Line the parchment paper or silicone mat on the cookie sheet and place a stencil on it. Use a small off-set spatula to pour the batter in the center of the hole and spread evenly. Lift the stencil carefully. Repeat this for more.
- Bake them in the oven till they get lightly brown on the edges. It may take 8-10 minutes.
- Remove them from the oven and while they are hot, take off the tuiles. Drape them on the rolling pin. Let it rest for a few minutes so that they get hard.
- Store them in an airtight container.
You can decorate a cake, ice cream, mousse or any dessert you want to make it spectacular. You can shape them as per your choice. Cut it or roll it according to the dish with which you will serve.
Nutritional Breakdown of Chocolate Tuile
Let’s have a look at the nutritional distribution of this recipe of chocolate tuile.
| Calories | 156 |
| Protein | 2.3g |
| Carbohydrates | 19.4g |
| Fat | 7.8g |
| Cholesterol | 20.3mg |
| Sodium | 19.39mg |
How to Make Chocolate Tuile at Home | Video
I have uploaded the recipe video. Watch it and be clear about the details. If you still have any queries, write them up in the comment section below and I will try to help you.

Do try this recipe and share your reviews in the comment section below. I would like to see how your attempt came out. Share your stories while making the recipe. Your suggestions are also welcomed. Write them up in the comment section and I will keep a note on that. Now, hurry and enjoy cooking.

